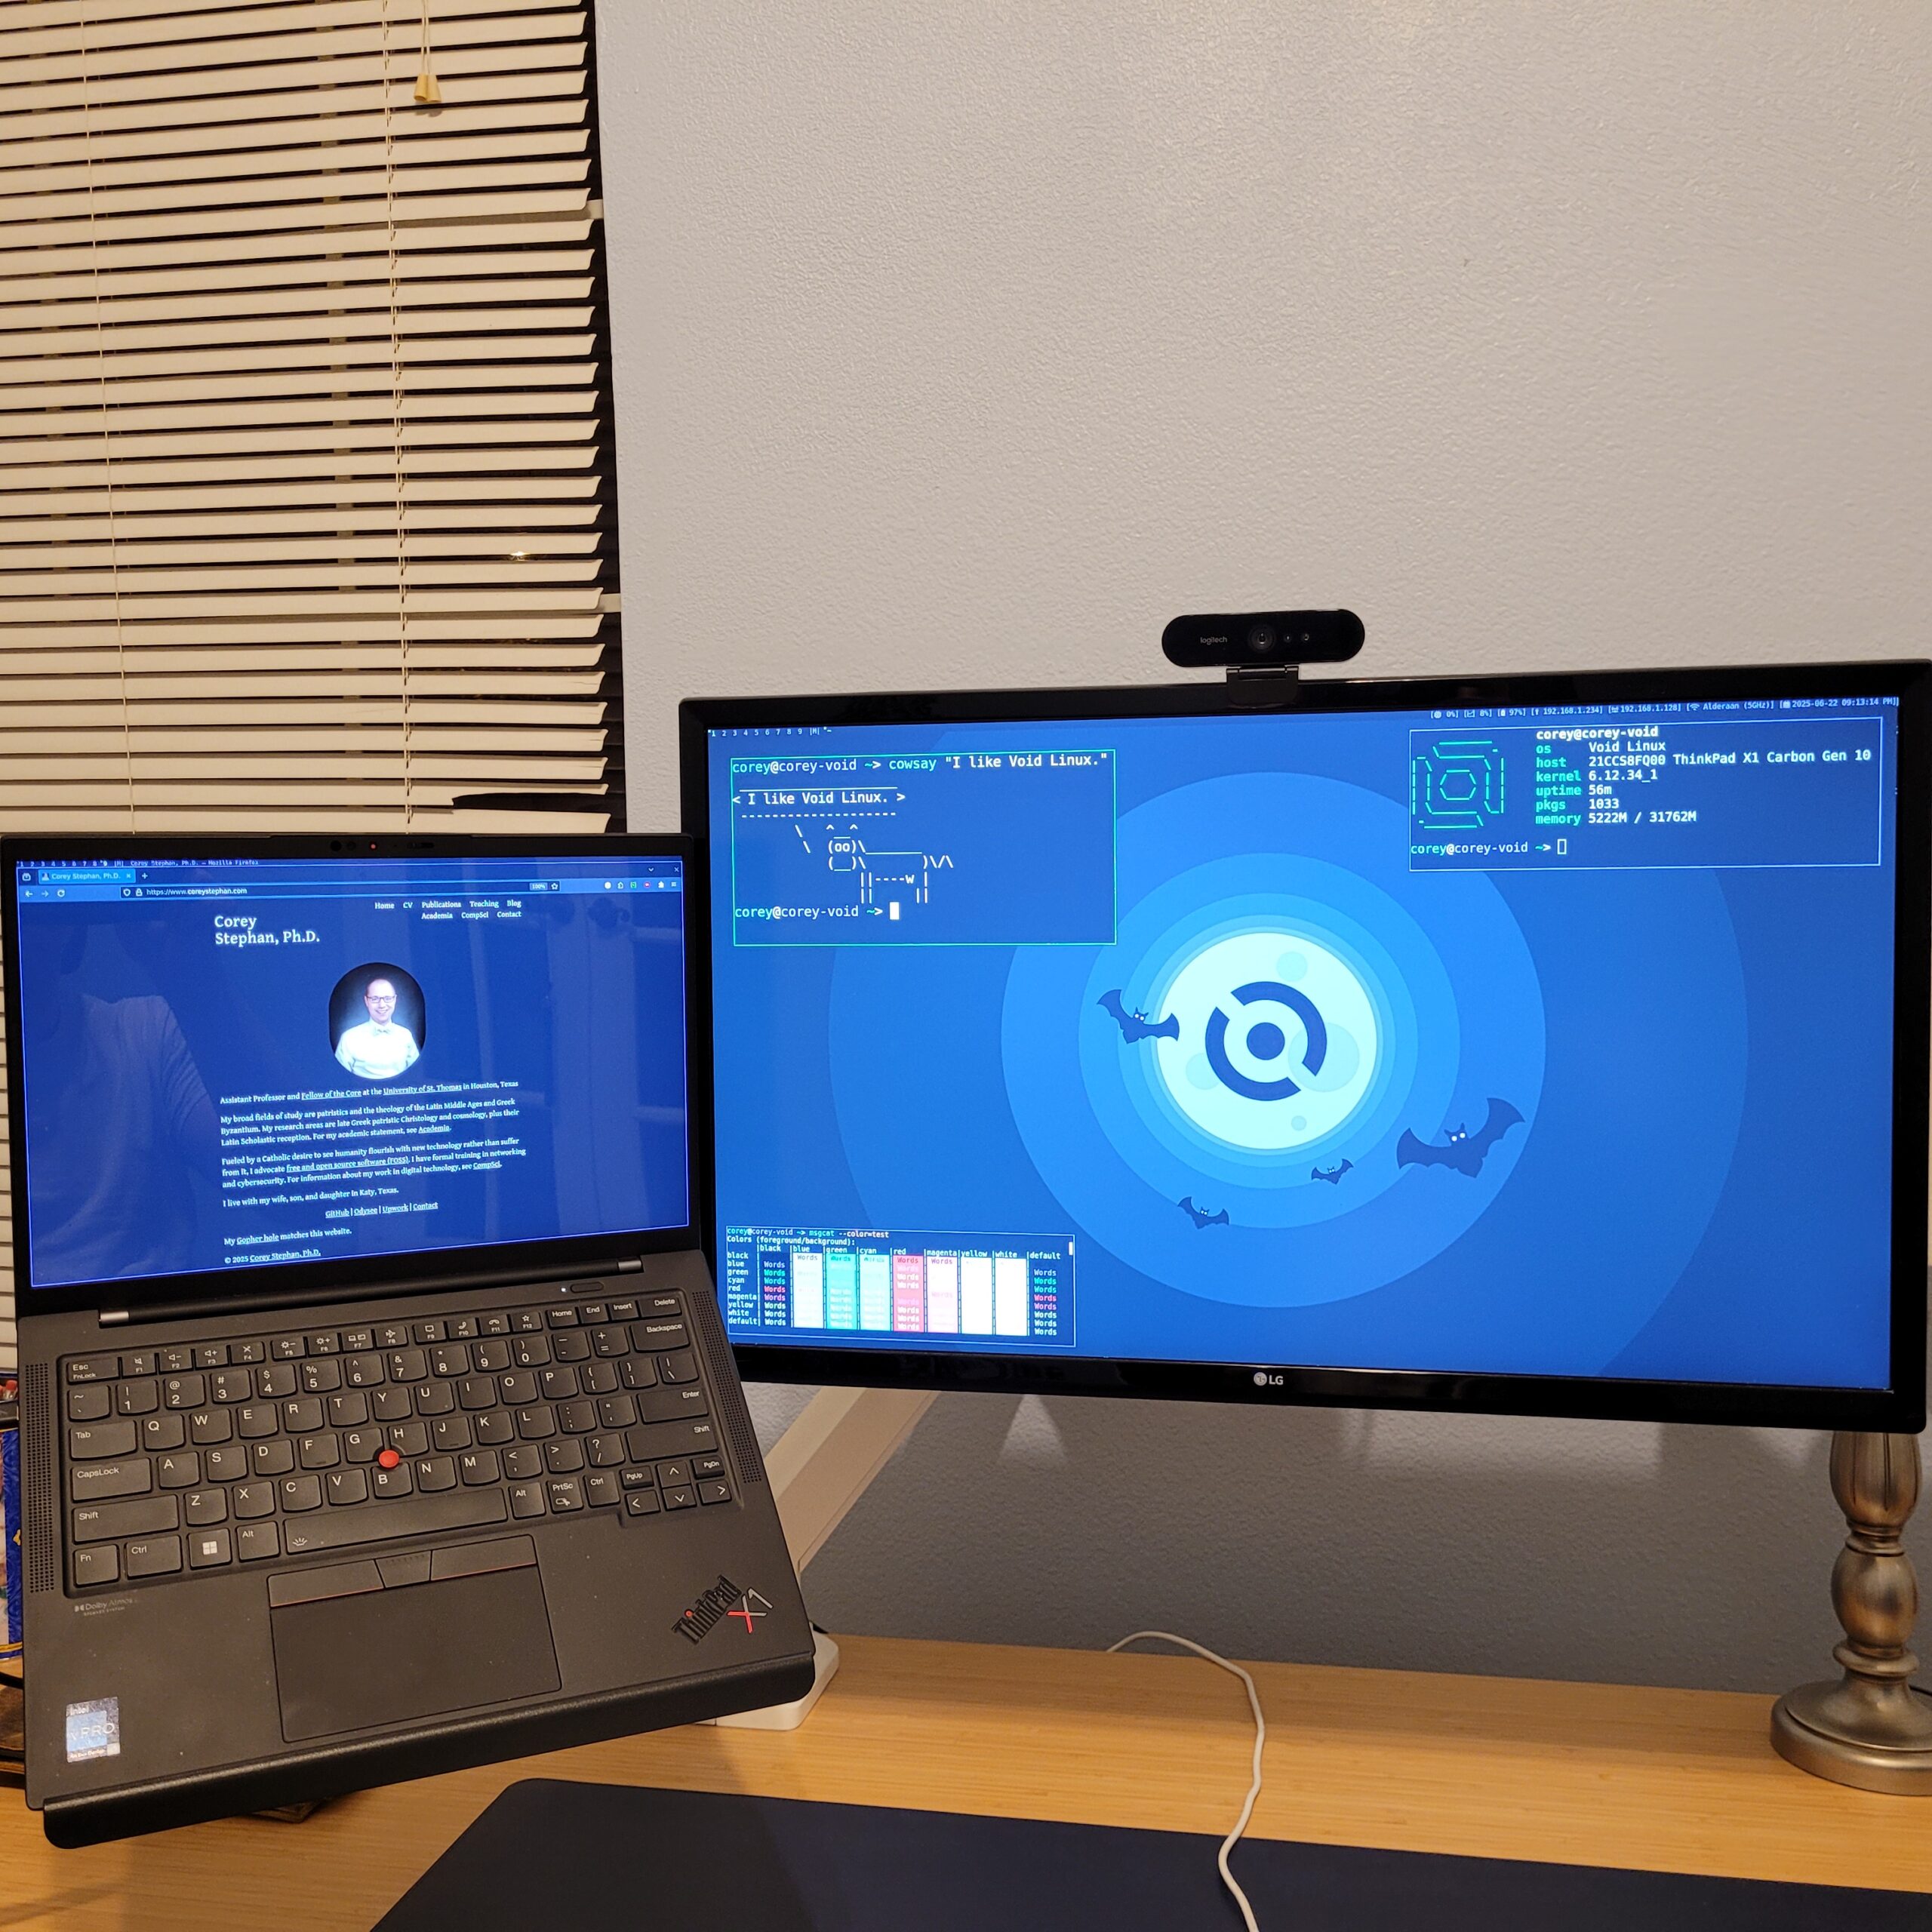
The desktop background in my photograph above is from the official wallpaper repository of the Dracula theme project.
Table of Contents
- Tutorial or Personal Notes for Public Consumption?
- Why did I choose Void Linux and dwl?
- Installation
- Initial Setup
- dwl
- Other Software
- How well does it all fit together?
- Changelog
Tutorial or Personal Notes for Public Consumption?
Following OpenBSD 7.4 on a ThinkPad X270 (plus my Theological Dotfiles) for Scholarly Work, this is my second long-form blog post in this format and style.
This tutorial (for lack of a better name) is an expanded and polished form of my personal notes on how to install Void Linux and configure my build of dwl (“dwm for Wayland”) on a Lenovo ThinkPad. I hope that this blog post will help at least one other person configure Void Linux for mobile research and writing.
Although these notes should be helpful for persons using a variety of laptop computers for mobile research and writing, they will be the most immediately relevant for other persons using T- or X-series Lenovo ThinkPads from the past decade, that is, circa 2015-2025. I have performed most of these steps both on my trusty-but-dying T590 (2019) and its replacement, my new (well, refurbished) tenth generation X1 Carbon (2022). Since Void uses the standard Linux kernel, hardware compatibility is excellent with nearly all T- and X-series ThinkPad devices.
I do not intend for these notes to be comprehensive, nor do I guarantee the accuracy and/or utility of anything contained within them. Instead of recommending that the reader put full faith in what I have written here, I humbly point him/her to the following sources. I have used all of these to prepare my own notes:
- For a full-length introduction to Void Linux, including a detailed installation guide, everyone ought to turn to the official Void Handbook. The Handbook is Void’s slim-but-curated guide to everything that is unique to Void relative to the more mainstream GNU/Linux distributions (e.g. Debian, Fedora, or Arch). One may download the entire Handbook inside Void for offline reading with the void-docs(1) package, or one may click the “Print” icon at the top of the online Handbook page to download the entire Handbook as a single .pdf file.
- The Handbook routinely points the reader to the manual pages (“man pages”) of the packages that are available in Void for richer documentation. With a given package installed inside Void, when the documentation says “item(#),” that is a reference to the manual’s entry at category #, entry [item]. A specific man page may be accessed at the terminal by typing
man # item(e.g.man 1 manto show the man page’s man page, man[1]). Additionally, the Void Linux team keeps a set of the man pages for all of the packages that Void has available in its repository available in one tidy Web interface. - Void Linux does not have active mailing lists. Instead, for public discussions and tips, the project leaders officially recommend the /r/voidlinux subreddit and the project’s GitHub repositories.
- For anyone looking to run Void on any laptop, especially a ThinkPad, I recommend Dave Eddy’s aging but lovely 2018 blog post “Using Void Linux As My Daily Driver,” from which I have drawn several ideas for my own setup (and, therefore, this blog post).
If you happen to find anything that I should change or improve, please let me know by leaving a comment below or writing to me at c o r e y (dot) s t e p h a n (at) s t t h o m (dot) e d u.
Why did I choose Void Linux and dwl?
I have selected a combination of operating system and Wayland compositor that preserves the workflows that I have optimized over many years while operating more smoothly with future-oriented technologies.
Relative to the most popular GNU/Linux distributions, Void Linux is more minimal, intelligible, and flexible. Its own package manager, the X Binary Package System (XBPS), is clean and quick. It ships with the nimble runit init scheme rather than the ubiquitous but gargantuan systemd. Overall, Void Linux takes obvious (often intentional) cues from the BSD operating system family, especially NetBSD (seeing as its founder was a longtime NetBSD developer), while having most of the hardware and software compatibility of any GNU/Linux distribution.
dwl is an unofficial continuation of my favorite X11 window manager, the suckless project’s dwm, in the forward-looking technological space of Wayland. A few years ago, all reports indicated to me that it still would be some time before wlroots-based Wayland compositors were ready for foolproof, stable daily productivity. Now, as of the middle of 2025, all reports indicate that such a time has come.
Installation
Void Linux has multiple official routes by which a person can achieve a desktop installation. One may choose, for example, either glibc or musl, and one may choose either to install a base (terminal-only) system atop which he/she will later install and customize a desktop environment, X window manager, or Wayland compositor (as I am doing) or to install Void’s pre-configured XFCE desktop environment.
One ought to consult the portion of the Void Handbook that covers installation to determine which options are best for his/her exact needs. Then, to achieve a successful installation, one should follow the Handbook‘s setup guide carefully. I note, however, that Void’s installer is guided, and it has sensible defaults with a simple interface that should make it easy to use for anyone who has previous experience with a terminal-based, guided Unix-like operating system installation (e.g. OpenBSD’s).
Now, glibc, which is effectively ubiquitous in the Linux space, has better software support than musl, and I do not happen to have an ideological preference for one or the other. Further, since what I am making is a desktop system for myself as a single-user, I do not stand to benefit from the security benefits of musl. Accordingly, I simply choose glibc. There is a non-zero chance that some piece of software that is critical for my workflow will install and function properly in the glibc release of Void but not in the musl one.
Since I am building a custom desktop setup atop Wayland, I do not need the installation image that comes with XFCE. Accordingly, I select the “base live” (with glibc) installation image from the “Download Void Linux” webpage rather than one of the “XFCE live” options. Someone who wishes to have Void’s official XFCE setup alongside a custom one (like mine, which I am outlining here) should feel free to choose the “XFCE live” (with glibc) image.
Here are two additional installation notes:
(1) While adding the non-root, regular user, leave all of the optional groups checked, as those are important for a desktop setup. Also, manually adding a ‘network’ group proactively will save a step when setting up NetworkManager (see below).
(2) As with some other Unix-like OSes’ installation scripts, Void’s (void-installer) can be finnicky with networking if a laptop is connected to a dock during installation. Anecdotally, I have found it to be the safest practice to run the installer with the laptop removed from the dock and connected to my router directly via a standard RJ-45 cable.
Initial Setup
After the first boot with an up-to-date Void installation, I login as root (from a console prompt) in order to perform a few key system configuration steps.
System Update
Void Linux uses its own brilliant X Binary Package System (XBPS), which was developed originally by a former NetBSD developer who prioritized — as someone from the NetBSD realm is likely to do — cleanliness and portability.
After an Internet-facing installation, all of Void’s packages should be up-to-date at the first boot. Nevertheless, my habitual practice is to do a full system upgrade immediately after installing any Unix-like operating system before I begin installing additional packages and making customizations.
This is the command to update the entire Void Linux operating system, that is, all packages:
xbps-install -Susshd (optional)
To assist with my first configuration of Void Linux, I enabled sshd(8) so that I could manage the laptop from my workstation while also drafting these notes (and, for example, copying inputs and outputs to and from the terminal emulator). Thus, I performed my first setup of a service with the slim, fast runit init scheme that Void Linux uses.
Void comes with sshd pre-installed but not pre-enabled. runit reads symlinks to know which services to run. To create the relevant symlink to enable the pre-installed sshd, I execute this one command:
ln -s /etc/sv/sshd /var/serviceI check that the service is running like so:
sv status sshdThe output verifies that it is:
run: sshd: (pid 631) 2441s; run: log: (pid 627) 2441sNow, I can login to my laptop via ssh as one would expect, e.g.
ssh corey@192.168.1.[###]This step will not be desirable with most mobile workstations, but these are my own notes, and now I will never forget how to enable sshd in Void.
Non-free Repository (optional)
Void Linux’s default package repositories only include 64-bit free software. Per this section of the Handbook, there are additional official repositories that one may add in order to install 32-bit compatibility and non-free software packages.
For most users’ purposes, the only additional official software repository that might be of value is the non-free one (with 64-bit software). Among other things, this repository contains the Nvidia video drivers and the Steam computer gaming software.
I do not need any of the additional repositories for Void Linux, including the non-free one, on my ThinkPad X1 Carbon with Intel WiFi and Intel integrated graphics that I am using for work. Yet, if I did need the non-free repository, such as on another device with an Nvidia GPU or on which I wished to install Steam, enabling it would be as simple as installing one package:
xbps-install void-repo-nonfreePower Management (tlp)
tlp is my preferred utility for power management on laptops. It is especially useful with Lenovo ThinkPads, for which tlp has built-in special configurations.
In Void, this is how to install the tlp(8) package and enable the service:
xbps-install tlp
ln -s /etc/sv/tlp /var/service
The configuration file is etc/tlp.conf
Root Access for [user]
During the guided installation, I leave the “wheel” group option checked (as it is by default) for the regular user (i.e. “corey”). Void automatically configures root access for the regular user with sudo(8).
I slightly prefer OpenBSD’s doas(1) over sudo, but I am happy to stick with Void’s default.
NetworkManager and WiFi Setup
Void Linux’s guided installer configures networking neatly with dchpcd(8). For a static system, such as a server or desktop, the default setup is likely to suffice. For a mobile workstation that will move from WiFi network to WiFi network, however, having quick network management is important. I am accustomed to using NetworkManager, so I follow the steps that are outlined in the Handbook to achieve a NetworkManager setup in Void Linux with runit:
xbps-install NetworkManager
sv down dhcpcd                                # disables dhcpcd
rm /var/service/dhcpcd                        # removes dhcpcd from runit services list
ln -s /etc/sv/NetworkManager /var/service     # enables NetworkManager service
ln -s /etc/sv/dbus /var/service               # enables dbus service, which is required for NetworkManager
reboot                                        # reboot is normally required to enable dbus
On ThinkPads with standard Intel WiFi chipsets, the relevant firmware is included in Linux (the kernel). nmtui shows the list of networks.
In order to use NetworkManager in Void Linux with my regular user account (rather than with the root account or by sudo), I need to add that account to the network group and install polkit(8). If I forgot to do this while first installing Void (see above), then I may use sudo nmtui to configure NetworkManager, and then I may take the steps to enabel non-root access:
usermod -a -G network [user]
sudo xbps-install polkit
Now, I may connect to and switch between WiFi networks quickly with nmtui
dwl
Prerequisites
The following tools and software packages must be installed and/or enabled in order to build and run dwl:
- git & wget
As with dwm, with dwl, the user compiles from source with his/her patches and changes. Upstream, dwl is housed in a git repository, and downstream, the user should apply patches, for example, by way of git commands. Git is essential. Also, I will use wget to download the official dwl release bundle.
xbps-install git wget- elogind & polkit
The Handbook outlines a few different methods by which one can achieve “Session and Seat Management” in Void Linux. elogind(8), a stand-alone fork of systemd’s login and session management systems (only), is regrettably the heaviest — and, yes, it comes from systemd — but it is also the least headache-prone. It takes at least 3 separate services (acpid, turnstile, and seatd) with various tweaks to achieve the same functionality that elogind does by itself (and by default). Here is how to install elogind:
xbps-install elogindThere should not be any reason to symlink the service, but per the Handbook, if there is a problem with login and/or permission, that is an optional step:
ln -s /etc/sv/elogind /var/serviceelogind requires dbus running as a system service. As far as I can tell, the step to install and enable dbus that I have outlined above should be considered a prerequisite for any custom desktop setup in Void.
NB: Per the Handbook, elogind should not be used together with acpid(8) with its default settings.
Generally, it is considered prudent to install polkit(8), as well, and I already needed this for NetworkManager (as I discussed above). There is not any need to symlink the polkitd service; it is summoned when needed.
- Graphics drivers
Per the “Graphics Drivers” section of the Handbook, Void Linux comes by default with the main Intel graphics driver. Per the “Wayland” section of the Handbook, however, there is at least one additional graphics stack package that is strictly required in order to run a minimalist Wayland compositor, that is, mesa-dri:
xbps-install mesa-driOther graphics-related packages might prove to be necessary with time, but this should be the only one that a ThinkPad (with an Intel CPU and Intel integrated graphics) will need to have manually installed in order to achieve a working Wayland compositor.
- foot & wmenu (& Alacritty & mew)
Most applications can be installed after setting up dwl, but a terminal emulator is strictly essential to have beforehand, and an application launcher is nearly as important.
The foot terminal emulator is the de facto minimalist terminal emulator for Wayland compositors, and it is, indeed, the default terminal emulator for dwl. wmenu is the default application launcher for dwl, and it works nicely in Void. Altogether, these two packages may be installed like this:
xbps-install foot wmenuAlternatively, I might install foot and tofi (rather than wmenu) and simply replace “wmenu-run” with “tofi-run” in static const char *menucmd[] = { tofi-run", NULL }; inside my config.h file so that tofi is the only launcher that I ever have in my installation.
Since I am (as of the time of writing) specifically using the Dracula color scheme, and I like the layout and function of dmenu for dwl, I like the official Dracula demu-style configuration for tofi.
Now, foot is a lovely terminal emulator, but like many others that I have tested (including urxvt and st), it does not display all Unicode characters correctly. Specifically, I find that I have problems with its character spacing when rendering polytonic (Ancient) Greek text. Alacritty, however, never has failed me with even the most complicated texts that I have opened inside it (through many years of using it exclusively). Plus, Alacritty can run natively in Wayland. For scholarly and other multilingual work, I recommend Alacritty over foot.
I install Alacritty:
xbps-install alacrittyLater, when I am editing config.h to my own requirements, I change the default terminal emulator for dwl (what spawns with ‘termcmd’) from foot to Alacritty:
static const char *termcmd[] = { "alacritty", NULL };
Also, while wmenu is nice, I happen to prefer mew, which has astonishingly simple compilation and setup for theming — with overall flawless integration into dwl. Also, I have found (anecdotally) that it does the basic job of launching software programs a bit more reliably than wmenu, specifically with AppImages. After building mew how I would like, I can change the default application menu (what spawns from ‘menucmd’) from wmenu to mew:
static const char *menucmd[] = { "mew-run", NULL };- Fonts
Following the “Wayland” and “Fonts” sub-sections of the Handbook, it is necessary to install at least one font package to run a minimalist Wayland compositor. I always enjoy Nerd Fonts as a starting point, and although the official, complete Nerd Fonts package is enormous (totaling 8GB), I do not see a compelling reason to fiddle with individual Nerd Font installations. The Libertine Fonts family, with its excellent multilingual support (including polytonic Greek) and legible serif styling, is useful on a free software-based scholarly workstation. I install both of these libre font families:
xbps-install nerd-fonts font-libertine-otf- dwl’s dependencies
Here is the complete command that I have assembled (following dwl’s official instructions) to install dwl’s own dependencies in Void Linux (without intending to enable Xwayland support, that is, Wayland only):
xbps-install libinput libinput-devel wayland wayland-devel wlroots0.18 wlroots0.18-devel libxkbcommon libxkbcommon-devel wayland-protocols pkg-configThe Void repository contains several release versions of wlroots in order to support different configurations. It is best to check dwl’s own documentation to determine which version of wlroots ought to be used with a given version of dwl. As of the time at which I am writing this blog post, the release version of dwl, 0.7, aligns with the most recent stable release of wlroots, 0.18.
With intending to enable Xwayland support, the following (single package) is also required:
xbps-install xorg-server-xwaylandVoid seems to include XWayland flags in most (or all) of its Wayland packages. Accordingly, all that one needs to do after this to enable XWayland support in dwl is uncomment (remove the hashes next to) the two Xwayland lines inside the file config.mk :
XWAYLAND = -DXWAYLAND
XLIBS = xcb xcb-icccm
As of mid-2025, the odds are high that one or two graphical software applications that someone would like to use in a desktop setup will need to run in XWayland, so building dwl with XWayland support is a good idea.
Finally, Void Linux does not come with GNU make, the GNU C Compiler, and other standard GNU-related software compilation utilities pre-installed. The good news is that they are available as a tidy meta-package:
xbps-install base-develDownload, Build, & Test Run
First, I download the latest official release of dwl as a .tar.gz (tarball) from the dwl project’s releases page in its git repository (which is hosted in Codeberg). Then, I extract the tarball and compile the source code as-is.
wget https://codeberg.org/dwl/dwl/archive/v0.7.tar.gz
tar -xzf v.0.7.tar.gz
cd dwl
make
sudo make clean install
Now, I test dwl with one command:
dwlThe launch is a success. The default keybinding to open foot is ALT+SHIFT+ENTER. This works, too, as does a quick test of Firefox (running in Wayland mode), which is able to accept my webcam input and so forth (thanks to the magic of elogind + polkit).
Patching and Tweaking
As with dwm, the default build of dwl is viable as a daily driver, but most users will wish to apply various community-made patches and other changes to the source code in order to make dwl their own. This is what I am doing, using a Git repository hosted on Codeberg to maintain my custom build.
The best place to find patches is in the official dwl-patches repository (also hosted on Codeberg). Inside the dwl/ directory, I create a folder called “patches,” inside which I place each “*.patch” file.
For my workflow, the “centeredmaster” patch is the most important, since that is my strongly preferred default tiling layout ( [side] [MAIN] [side] ). I like to switch between layouts, and the “nextlayout” patch makes doing so simple. Finally, I only wish to use a simple bar, but unlike dwm, dwl does not come with one. The “bar” patch (plus optional “barcolors” and other “bar*”-named supplemental patches) imitates the dwm bar nicely, and it is works well with the Suckless project’s slstatus tool (next topic).
The bar patch requires the following packages from the Void repository:
xbps-install tllist fcft pixmanWith those dependencies having been met, I may apply patches from largest to smallest with the straightforward patch(1) command each time:
patch -p1 < patches/[name].patchIn my case, “largest to smallest” means this sequence: (1) bar.patch, (2) centeredmaster.patch, (3) barcolors.patch, and (4) nextlayout.patch.
Moving largest to smallest helps avoid conflicts, but there still can be difficulties. Occasionally, a patch will not merge correctly at all. More commonly, a problem with applying a patch will be something immediately fixable. For me, the “nextlayout” patch does not automatically add a few important lines to config.def.h because the “centeredmaster” patch already changed the relevant code blocks, so I simply copy and paste those few lines manually. Otherwise, these four patches do not require manual interventions.
During initial patching, it is important to avoid making changes to config.h, which (as with dwm) functions effectively as dwl’s user configuration file. Patches often change key parts of config.def.h, the ‘default’ configuration file on which config.h is generated if it does not already exist during make. config.h, in turn, is the ‘user’s’ configuration file, which one should modify after one has patched dwl as one would like, adjusting things like monitor settings and keybindings inside that (secondary) file.
In my freshly patched build of dwl, the most important changes for me to make in config.h are (1) the default screen scale, (2) the default tiling layout, and (3) the default modifier key.
For (1), I exclusively work in HiDPI displays, so setting a default scale of 2.0 will ensure that I always will be able to read what is on display. I make the following single character change in static const MonitorRule monrules[] = {:
{ NULL, 0.55f, 1, 1, [etc]to
{ NULL, 0.55f, 1, 2, [etc]Here is how my specific layouts are hard-coded for my ThinkPad X1 Carbon’s built-in display and my 27″ 4K external one:
{ "eDP-1", 0.5f, 1, 2.25, [etc.]
{ "DP-7", 0.5f, 1, 1.675, [etc.]
In dwl, it really is that simple to have fractional scaling (in my case, one display at 2.25x and the other at 1.675x) that is both permanent and seamless, even when dragging windows across displays at different fractional scale factors.
Changing the default tiling layout (2) is just as simple. In static const Layout layouts[] = {, I simply move the line with “centeredmaster” to the first position, and I rearrange the remaining layouts in my preferred sequence:
/* layout(s) */
static const Layout layouts[] = {
	/* symbol     arrange function */
	{ "|M|",      centeredmaster },
	{ "><>",      NULL },    /* no layout function means floating behavior */
	{ "[]=",      tile },
	{ "[M]",      monocle },
	{ NULL,       NULL }, /* terminate */
};
Generally, if I am switching away from “centeredmaster,” it is because I need a whole workspace to be stacked rather than tiled. Accordingly, I prefer this sequence: “centeredmaster,” then “NULL” (floating), then “tile,” and finally (my least preferred dwl layout) “monocle.”
Finally (3), I dislike ALT being the default modifier key, (strongly) preferring LOGO/SUPER (Windows). Accordingly, I change the line #define MODKEY WLR_MODIFIER_ALT to #define MODKEY WLR_MODIFIER_LOGO.
slstatus custom build
The documentation for the lovely “bar” patch for dwl includes a note that it can be used with the Suckless project’s status bar utility, slstatus (for “suckless status”), by piping its stdout(3) message to dwl via stdin(3) when launching dwl:
slstatus -s | dwlAs with other Suckless software (and dwl), any changes to slstatus must be made in the source code. As with dwl, then, I am using a Git repository on Codeberg to maintain my custom build of slstatus.
For a minimalist ThinkPad status bar, something close to this works well at the end of config.h:
static const struct arg args[] = {
	{ cpu_perc, "[CPU %s%] ", NULL },
	{ ram_perc, "[RAM %s%] ", NULL },
	{ battery_perc, "[BAT %s%] ", "BAT0" },     # system battery label
	{ ipv4, "[LAN IP %s] ", "enp0s31f6" },      # system RJ-45 label
	{ ipv4, "[WLAN IP %s] ", "wlp0s20f3" },     # system Wi-Fi card label
        { wifi_essid,  "[WiFi %s] ", "wlp0s20f3" }, # system Wi-Fi card label
	{ datetime, "[%s]", "%F %r" }
};
In order, the resultant slstatus build will show the following dynamic values in real-time:
- CPU usage percentage
- RAM usage percentage
- Battery charge percentage
- Wired network IP address
- WiFi IP address
- SSID of the WiFi network to which the laptop is connected
- Date and time
There are many sample slstatus setups available across the Web. Embarrassingly, I lost track of the specific configuration from which I launched my own, but there are dozens to hundreds like it that are publicly available.
With slstatus, it is important to make sure that each specified piece of hardware, such as “BAT0,” is labeled in the exact same way that it is officially demarcated inside the operating system. For a WiFi card, for example, I would run nmtui to check the name of the WiFi card, for which I would find a device called “wlp[etc].”
Also, with the Nerd Fonts project’s “Cheat Sheet,” it is easy to find icons to use in place of textual labels, such as an icon of a CPU instead of the text “CPU.”
Screen Brightness Control
There are many ways to control screen (and keyboard) brightness in a wlroots-based compositor. Here is one easy way to do so from the terminal in dwl on Void:
First, install brillo(1):
xbps-install brillo
Then, enable [user] to have sudo privilege for brillo without a password. Run [sudo] visudo to open the safe sudo file editor, and append this to the bottom of the file:
[user] ALL=(ALL) NOPASSWD: /usr/bin/brilloFinally, use brillo. For example, increase the screen brightness to 100% with this quick command:
brillo -S 100I like to have brillo -S 50 in my autostart script so that my laptop’s internal display is always at 50% (medium) brightness when I first enter my digital work environment.
After configuring brillo and sudo, to control screen brightness with the ThinkPad’s brightness keys, I may add four quick lines to config.h (with guidance from the Arch Wiki entry on dwl). First, in the section with defined commands, I define ‘lightup’ and ‘lightdown’ commands as +5% and -5% brightness, respectively:
static const char *lightup[]   = { "brillo",   "-A", "5", NULL };
static const char *lightdown[] = { "brillo",  "-U", "5", NULL };
Then, in the section with defined keystrokes, I assign the brightness keys on the keyboard to the ‘lightup’ and ‘lightdown’ commands:
{ 0, XKB_KEY_XF86MonBrightnessUp, spawn, {.v = lightup} },
{ 0, XKB_KEY_XF86MonBrightnessDown, spawn, {.v = lightdown} },
Audio, Screencasting, & Screen Recording (Pipewire + xdg-desktop-portal-wlr)
Per the “Multimedia” section of the Handbook, Void Linux officially supports ALSA, PulseAudio, and Pipewire. I have used PulseAudio for many years. Pipewire is probably the future of audio management in GNU/Linux, and it is currently required for screencasting in wlroots-based Wayland compositors like dwl. I follow the relevant entry in the Handbook to install Pipewire with the PulseAudio interface, which provides the broadest software compatibility. As of the time of writing, with elogind and dbus both enabled (see above), this simply entails
xbps-install pipewire
and then creating two symlinks:
mkdir -p /etc/pipewire/pipewire.conf.d
ln -s /usr/share/examples/wireplumber/10-wireplumber.conf /etc/pipewire/pipewire.conf.d/
ln -s /usr/share/examples/pipewire/20-pipewire-pulse.conf /etc/pipewire/pipewire.conf.d/
For runtime configuration of Pipewire with the PulseAudio interface, I am fond of PAmix, an ncurses (TUI) PulseAudio mixer written in C that is similar in layout and functionality to the LXQt project’s minimalist (GUI) mixer pavucontrol-qt, which I have used for years (and which also works nicely with Pipewire in Wayland):
xbps-install [PAmix/pavucontrol-qt]One quirk of the PulseAudio interface is that audio output devices might be muted by default. To fix this problem with PAmix, I tap F3 to reach the Output Devices menu, the up or down arrow on the keyboard to select the desired device, and the “m” key (with the desired device selected) to toggle mute/unmute.
Screencasting/screensharing, such as for a Jitsi Meet video conference in Firefox, took some time for me to configure in dwl. As of the time of writing, I still only have it working specifically in Firefox (not, for example, in Chromium or in Chromium-based Electron applications). Screencasting in Firefox relies on Pipewire, plus xdg-desktop-portal-wlr, xdg-desktop-portal-gtk, and slurp:
xbps-install xdg-desktop-portal-wlr xdg-desktop-portal-gtk slurpThen, one needs the following lines in one’s dwl launch script:
export XDG_SESSION_TYPE=wayland  % necessary
export XDG_CURRENT_DESKTOP=sway  % the sway preset works with dwl
MOZ_ENABLE_WAYLAND=1             % probably unnecessary (legacy)
After following these setup steps for screencasting, screen recording works automatically in at least two prominent utilities, namely, the command-line tool wf-recorder and the graphical tool Open Broadcaster Software (OBS) Studio, both of which are available in the main Void software repository (xbps-install wf-recorder obs).
Screen Sleep (swayidle & wlr-randr)
There probably are many ways to achieve reliable automatic screen sleeping in dwl on Void with elogind. My solution works, but I readily admit that it is inelegant (and I would love for a reader with a decisively better approach to comment about it below and/or write to me by email). I have partnered swayidle, the Sway project’s official idle management utility, and wlr-randr, a wl-roots clone of xrandr.
First, I installed the two packages:
xbps-install swayidle wlr-randrThen, I combined the two programs’ flags into one line in my autostart file:
swayidle timeout 300 "wlr-randr --output eDP-1 --off ; wlr-randr --output DP-7 --off" resume "wlr-randr --output eDP-1 --on ; wlr-randr --output DP-7 --on" &swayidle waits for 300 seconds (5 minutes) before disabling the laptop’s internal display and then the external display (in immediate succession), and with any kind of resume (keyboard or mouse input) it enables both again (in immediate succession).
Launch Script with Homogeneous Theming
To achieve homogeneous theming in any stand-alone X11 window manager or Wayland compositor, refer to the excellent guide in the Arch Wiki. I happen to prefer Qt applications over GTK applications, so the settings that I sample here are for a setup that prioritizes Qt.
For this forward-looking setup, I use qt6ct (rather than the older qt5ct that I am accustomed to using) and kvantum.
To assist with achieving the desired theming inside dwl, I include the relevant environment variables in my dwl launch script:
export QT_QPA_PLATFORM=wayland
export QT_QPA_PLATFORMTHEME=qt6ct
export SAL_USE_VCLPLUGIN=gtk3
First, this sets Qt to default to Wayland. Second, it sets the Qt theme to whatever is configured in qt6ct (which includes options for enabling Kvantum). Third, it triggers the setting that LibreOffice needs to know that it should use the system’s GTK theme (since, per my own testing, LibreOffice currently scales correctly not in Qt in dwl but, rather, in GTK).
Other Software
Void Packages
Most major desktop software applications are easy to install and run in Void, and most have native Wayland support. For example, I need LibreOffice with GTK theming and, as of the time of writing, the OpenJDK17 runtime environment (to be able to use extensions):
xbps-install libreoffice libreoffice-libgtk openjdk17 openjdk17-jreSearching for packages in the Void repository is slightly cumbersome with xbps relative to other (especially more mainline) *nix package managers. If I wanted to find all of the packages with “firefox” in their name, for example, I might type this:
xbps-query -s firefox -R --regexThe -s flag means “search,” the -R flag means “Repository,” and the –regex flag means “[be open to all] regular expressions.” For more information about options for remote and local package search querying, refer to xbps-query(1) in the man pages.
Other helpful software packages that I will use specifically for my dwl setup include the following (using the Void package names):
| wdisplays | GUI display manager for wlroots-based compositors |
| wbg | Command-line wallpaper setter for wlroots-based compositors |
| nwg-look | Theming support for GTK3 in wlroots-based compositors (I mostly use Qt, but I appreciate consistent theming) |
| waylock | Screen locker for wlroots-based compositors (like slock for X11) |
| grim | Screenshot utility for wlroots-based compositors |
| micro + wl-clipboard | Terminal text editor plus wlroots-capable cross-application clipboard |
To discover utilities for Wayland, I like to consult rcalixte’s awesome-wayland repository in GitHub, which is regularly updated with community input.
AM for AppImage Management
The Void Linux official software repository is undoubtedly clean and easy to use, and it contains most software that someone might wish to use in a GNU/Linux desktop setup. Yet, as with most libre OS projects, there are never enough volunteers for contributing package builds. With Void in particular, the overseers of the package repositories understandably block certain kinds of packages (from giving them needless headaches), such as specialized GUI programs with complex build requirements. Some ‘fat’ programs, however, are helpful (or necessary) for scholarly work, such as Zotero (especially), Joplin, and Anki. The good news is that all 3 of these GUI utilities, and many others, are available from their upstream developers as AppImages, which are supposed to be self-contained (including all dependencies) in order to run on any GNU/Linux distribution.
One convenient way to manage AppImages on any glibc-based GNU/Linux distribution is to install the AppImage Package Manager by ivan-hc.
First, one needs curl:
xbps-install curlThen, one may download and launch the official AM setup script in one step:
wget -q https://raw.githubusercontent.com/ivan-hc/AM/main/AM-INSTALLER && chmod a+x ./AM-INSTALLER && ./AM-INSTALLER && rm ./AM-INSTALLERThe setup script includes the option to have a system-wide installation (with the basic command am) or a local-only (user-specific) one (with the basic command appman). For simplicity’s sake, I choose the system-wide installation, since this only ever will be a single-user system.
Now that I have the AppImage Package Manager installed as a system-wide installation, this is all that I have to do to install Zotero, Joplin, and Anki:
am install zotero joplin ankiOften, AppImages are built with the expectation that one is using one of the full-sized, standard desktop GNU/Linux distributions, especially Ubuntu or Fedora. In an alternative distribution, especially a minimalist one like Void, dependencies are sometimes missing.
In Void Linux, Zotero will be missing one of its required libraries by default, which I was able to locate with a few minutes of trial and error:
xbps-install dbus-glibOn any Wayland system (as of mid-2025), Joplin, as with most Electron applications, will perform at its best if it is specifically instructed to launch with all of its Wayland options:
joplin --enable-features=UseOzonePlatform,WaylandWindowDecorations --ozone-platform=waylandFor Electron applications to launch in Wayland automatically, one may add the following environment variable to one’s dwl launch script:
export ELECTRON_OZONE_PLATFORM_HINT=waylandAnki seems to prefer to have fcitx (a special input toolkit, basically) installed:
xbps-install fcitxAnki will perform at its best if is specifically instructed to launch in Wayland:
ANKI_WAYLAND=1 ankiAgain, this may be set as an environment variable in one’s dwl launch script so that Anki will always launch in Wayland:
export ANKI_WAYLAND=1pCloud
As of the time of assembling this blog post, pCloud (Desktop) is the only piece of software for which I need XWayland support (see the compilation option for XWayland support in dwl above). Software running in XWayland looks blurry in a fractionally scaled Wayland environment, but I only need to interact with the Electron GUI for pCloud on occasion. Otherwise, I simply leave pCloud running as a background process.
To setup pCloud, I start by making sure that I meet the prerequisite package requirements:
xbps-install fuse zlib hicolor-icon-theme
After I download the AppImage from the pCloud website, I move it to an executable path and mark it as executable:
mv pcloud /usr/local/bin/pcloud
chmod +x /usr/local/bin/pcloud
Finally, I force pCloud to launch in XWayland without desktop integration (since I am not using a desktop environment):
DESKTOPINTEGRATION=false GDK_BACKEND=x11 pcloudIn an autostart script, I can modify this slightly to avoid any potential hiccups with GDK_BACKEND on native Wayland applications by having =wayland be the default with =x11 as a fallback. Plus, I can use a simple ampersand for pCloud to run as a background process:
DESKTOPINTEGRATION=false GDK_BACKEND=wayland,x11 pcloud &Diogenes
I use the Diogenes libre software application to interact with pre-modern Greek and Latin texts. Diogenes is released with official .deb and .rpm images, but to be installed ‘natively’ on Void, I would need to go through the non-trivial process of compiling it from source. There is, however, an official image that is marketed as being for Arch Linux but is actually a simple .tar.xf file that contains an Electron binary that should run on any GNU/Linux system with Perl. Here is how one may install Diogenes on Void Linux:
xbps-install perlto make certain that Perl is installed.- Download the Diogenes image for Arch Linux.
tar -xf Diogenes-[version].tar.xz -C [~/Diogenes]
Now, to run the Diogenes desktop GUI, I simply need to enter the Diogenes folder and run /.diogenes
Like Joplin (see above), Diogenes is built in Electron, so running it in Wayland is simple (and may be done with the same envirnoment variable or flags as Joplin and other Electron applications).
The binary for the Diogenes server may be used instead for interacting with texts (in the same way as in the Electron application) inside a Web browser with, for example, the ability to use one’s favorite website color scheme and typefaces:
[~/Diogenes]/usr/local/diogenes/server/./diogenes-server.plThen, point the Web browser to http://127.0.0.1:8888
Microsoft TrueType Fonts
According to the messages in this helpful Reddit thread, Void Linux does not have an automatic way to install Microsoft TrueType Fonts, which are required for most academic work (notably, the horribly overused Times New Roman). While I suspect that purists compile the msttcorefonts package from Void’s official templates for restricted software, I have found that an easier way to install these typefaces is to clone one of many public git repositories that contains all of them to /usr/share/fonts:
cd /usr/share/fonts
sudo git clone [https://github.com/FSKiller/Microsoft-Fonts]
How well does it all fit together?
While Wayland still does not have universal desktop software support, nothing is lacking even for my specialized workflow. While wlroots and dwl are not yet entirely polished, I find using them to be quite pleasant, and they are sufficiently stable for me to use through long hours of historical research and writing. While I would not install Void Linux on the laptop computer of a non-geek (as I would do with ElementaryOS, Linux Mint, and several other ‘beginner friendly’ GNU/Linux distributions), I cherish Void’s hygiene — and its intuitiveness for me as someone who has real desktop work experience in Debian GNU/Linux, FreeBSD, and other libre Unix-like operating systems.
Overall, everything that I have discussed in this blog post fits together nicely. Void Linux with dwl is a compelling combination for daily academic work.
Deus vos benedicat,
Corey Stephan
Changelog
- July 17, 2025 – Note on mew
- June 30, 2025 – Notes on brightness keys + Alacritty
- June 22, 2025 – Initial Post